
How to make a double dimple (5)
Turn the other end toward you to make a “W” shape under the knot as well as above the knot. The center should be bulging, and the left and right sides should be balanced.

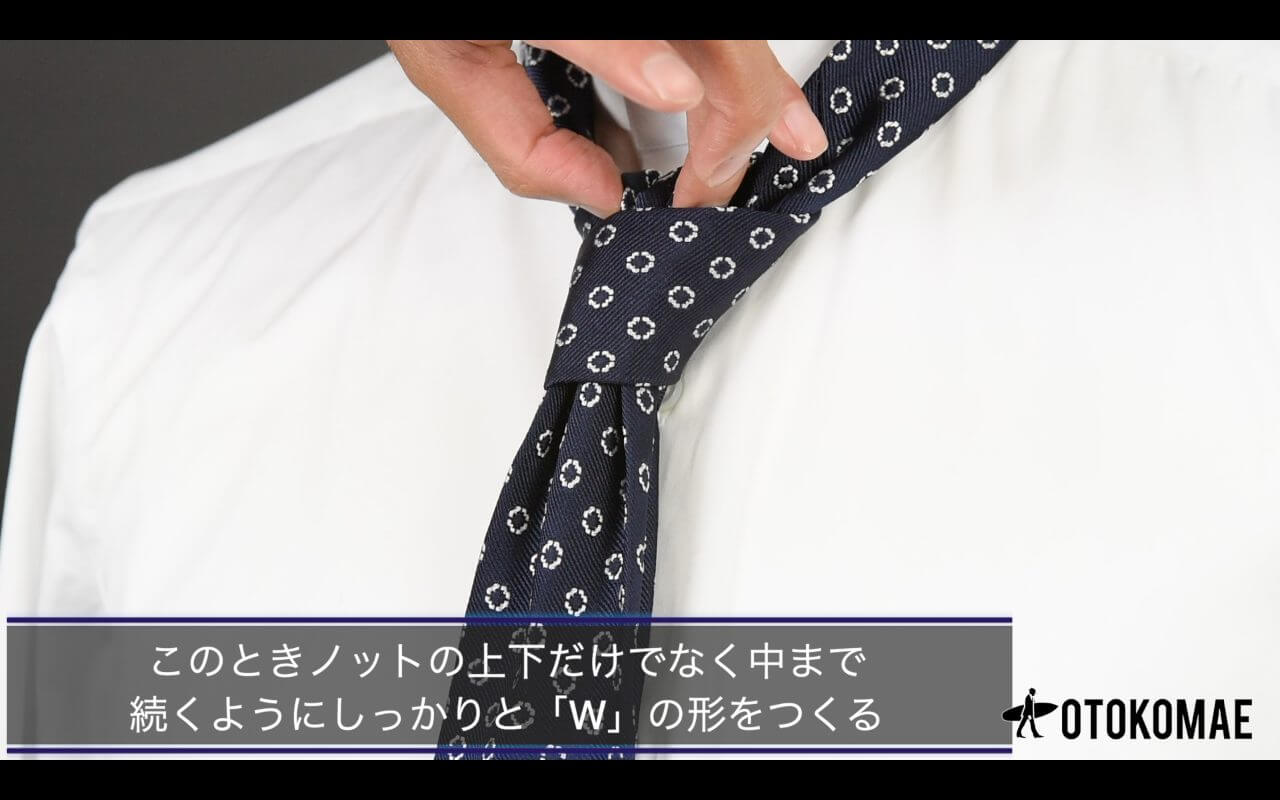
How to make a double dimple (6)
The “W” shape should extend not only up and down, but also into the middle of the knot. If the “W” shape does not extend all the way into the knot, the dimples will quickly collapse when the tie is tightened, so make sure to create a firm shape.
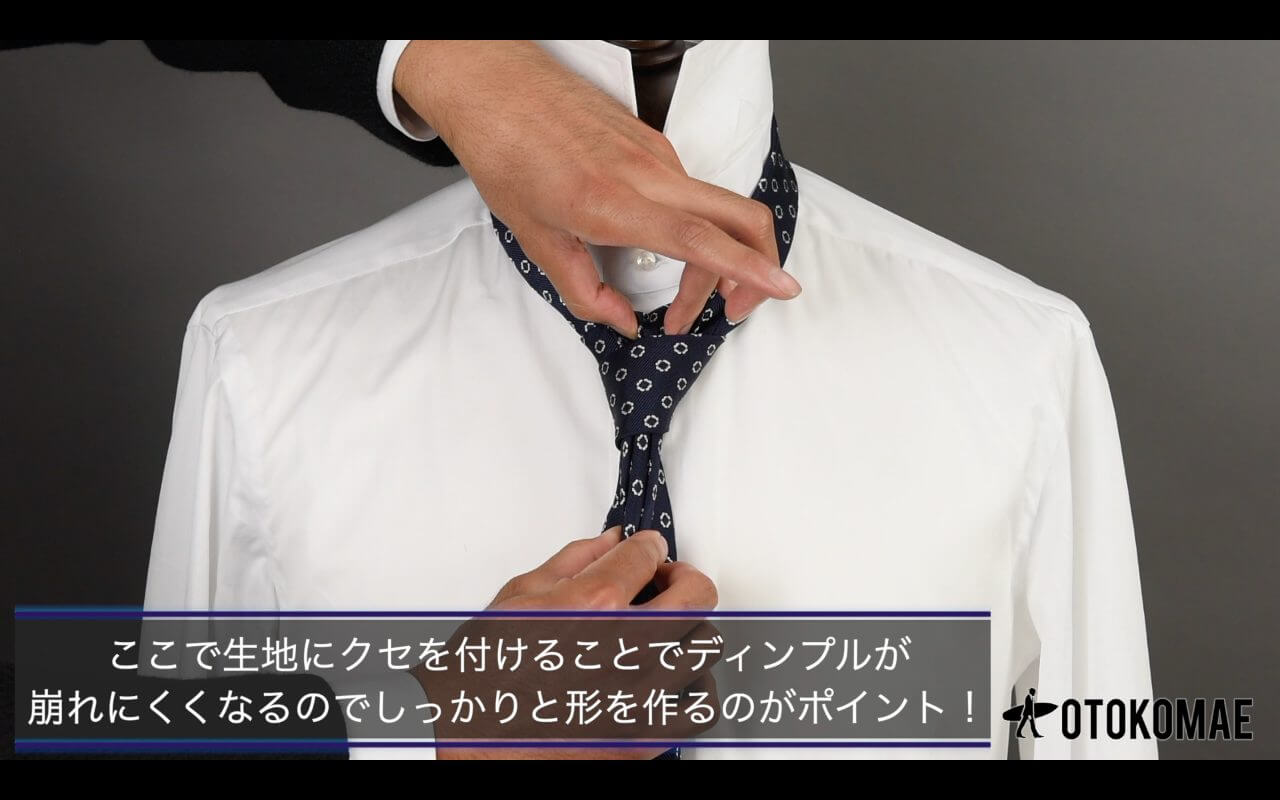
How to make a double dimple (7)
Once the shape has been created, pinch the knot firmly with your fingers. This will ensure that the dimples will not collapse throughout the day, even after the tie is tied.
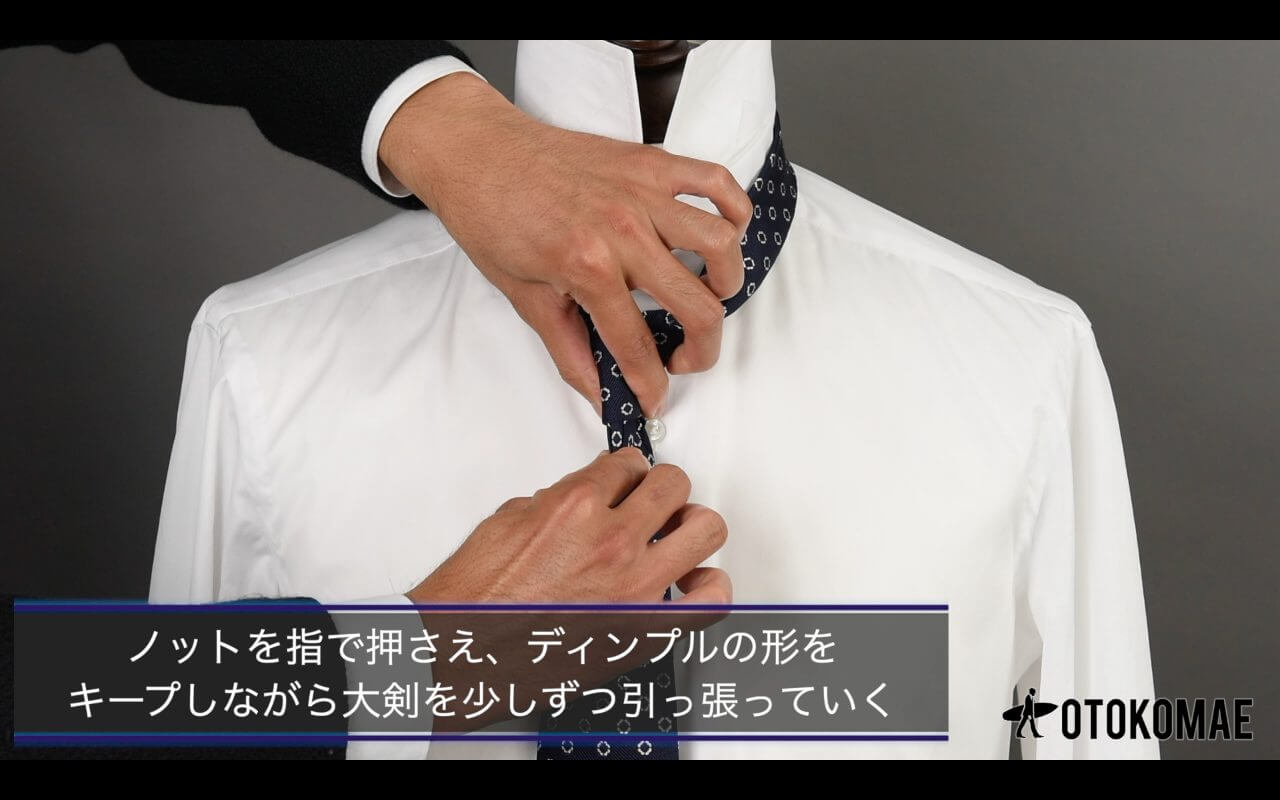
How to make a double dimple (8)
Once the dimples are in place, hold the knot with your fingers and gradually pull the large sword down to tighten the knot.


![How to put on a necktie pin [ 6 points ].](https://otokomaeken.com/wp-content/uploads/2017/11/2a34cccf22739f23f15d52d6ab094b6c-630x331.jpg)


![How to Choose a Necktie [ 5 Perspectives on Choosing the Best Necktie ].](https://otokomaeken.com/wp-content/uploads/2017/12/c7c97bb73b0eb6488874d99641a5f9cd-630x331.jpg)


![A reference book on how to coordinate shorts for adults [ from practical advice to pointers you'll want to talk about ].](https://otokomaeken.com/wp-content/uploads/2025/07/722fc9eed6eea53457781f45fdb71a972e3000922bbad94b4a83a7f077160fd6-750x396.jpg)