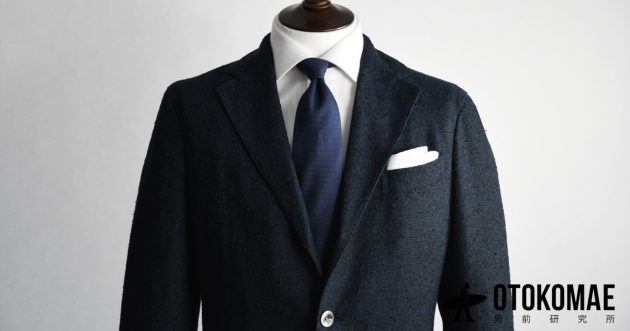
The “Windsor knot” is the classic English-style necktie knot. The Windsor Knot is a knot that reproduces the tie-like knot that Lord Windsor used to tie up. In this video, we will show you how to tie the Windsor Knot.
[ Related article ] To learn how to tie a plain knot without breaking the dimple, please visit ↓
Suponsered by
What is the Windsor Knot?
The Windsor knot is a knot that creates a larger, fluffier triangle than the plain knot. At that time, the ties tied by Lord Windsor had a special interlining, which made the knot large and plump. It is said that this knot was proposed to express such a knot. It is interesting to note that Lord Windsor himself denied using this knot in his memoirs.
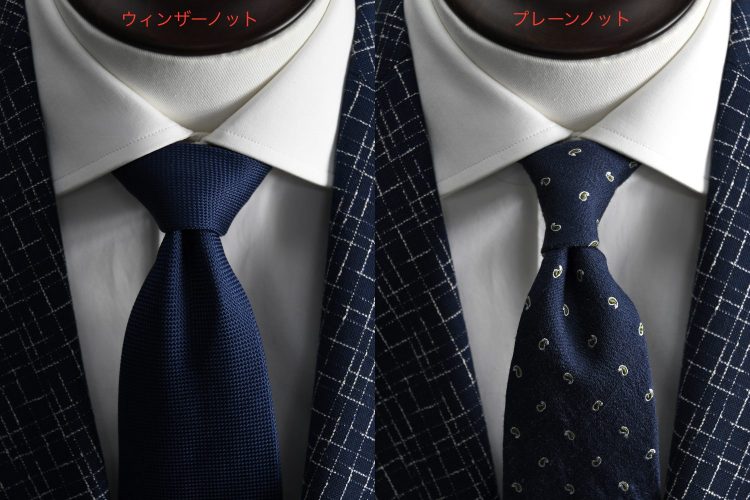
Compare with the plain knot, it is easy to see the difference in the shape of the knotThe Windsor Knot works well with shirts with a wide collar angle
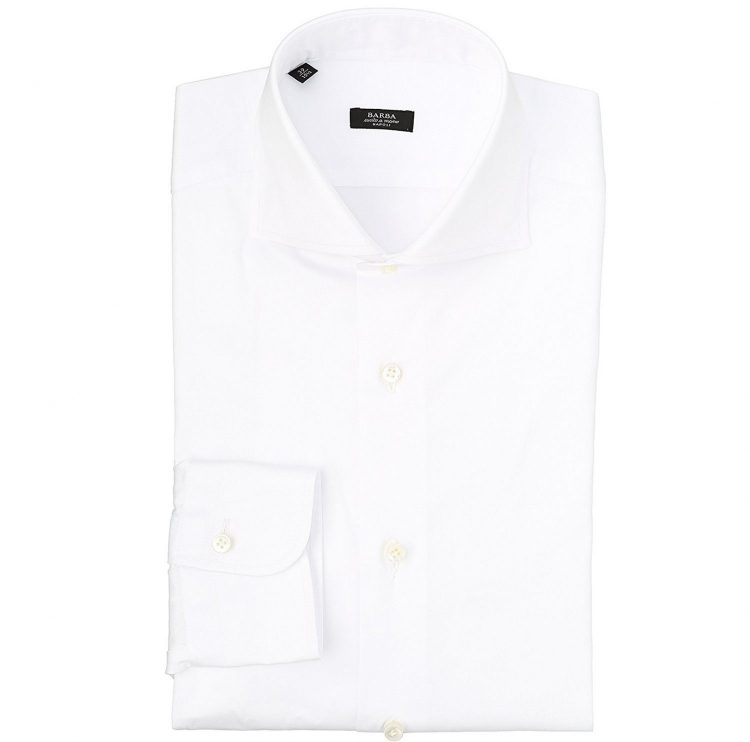
Since the knot is large, it goes well with shirts with wide collar angles, such as wide collars and horizontal collars. It should also be utilized by those who feel that the chest area is a little lacking, or when the V-zone needs to be emphasized.
BARBA’s Horizontal Collar Shirt Click here for details and to purchase
Neckties – Learn how to tie the Windsor knot!
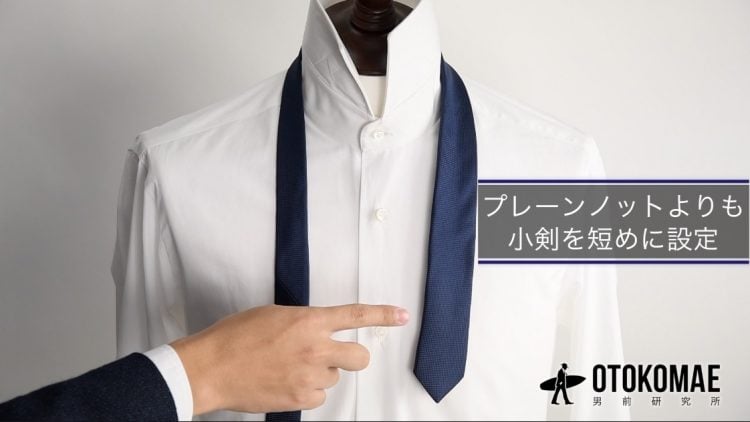
How to tie the Windsor knot ” with a shorter small sword than the plain knot
Compared to the plain knot, the Windsor knot requires more wrapping of the large sword, so it is important to set the small sword shorter.
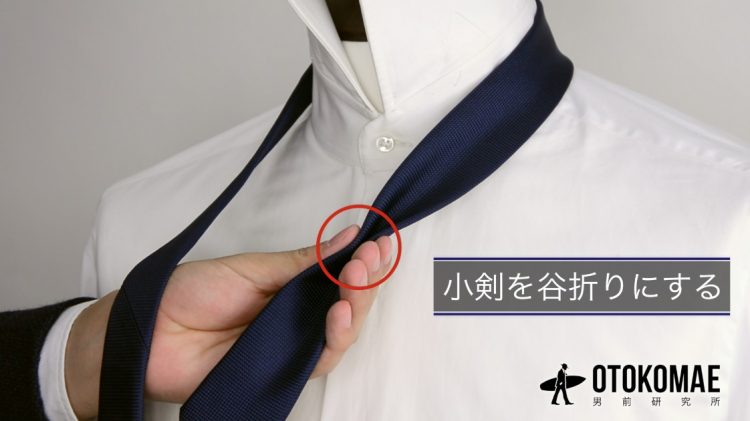
How to tie the Windsor knot ” with the small sword in a valley fold
By first valley-folding the small sword, it is easier to create a beautiful knot without excess wrinkles.
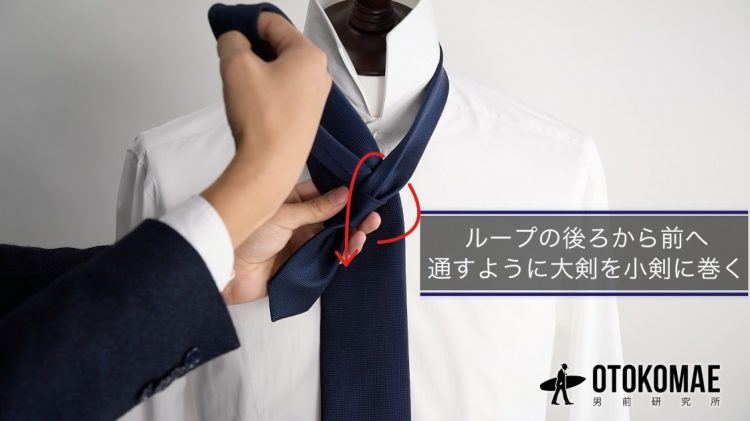
How to tie the Windsor Knot “Wrap the large sword around the small sword
While keeping the crease of the small sword folded in the valley, wrap the large sword around the small sword, bringing it from the inside of the loop to the front.
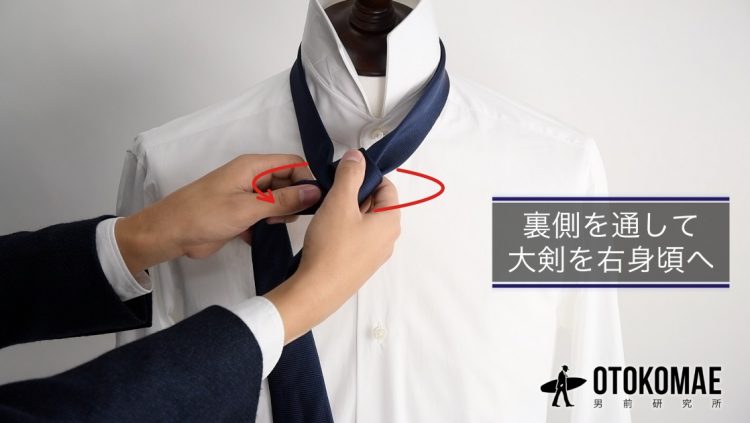
Windsor Knot – “Bring the large sword through the back side to the right side of the body”
Move the large sword to the right side of the body, passing behind the knot.
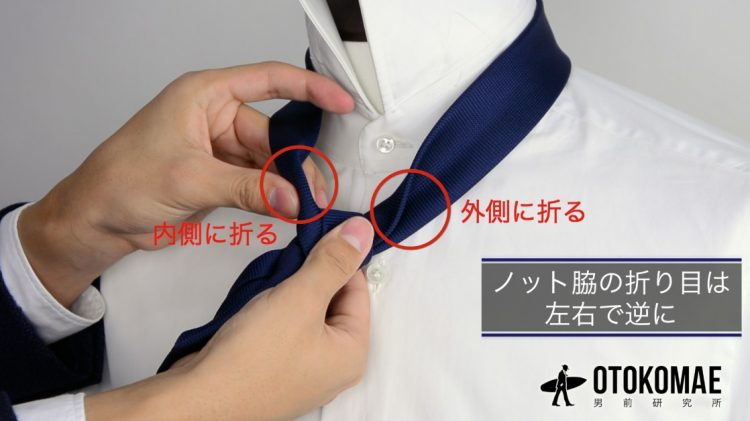
Windsor Knot – “Fold in opposite directions “
The crease at the side of the knot should be on the opposite side of the right and left sides. The small sword folded at the beginning should be folded outward (valley fold) and the other side should be folded inward (mountain fold).
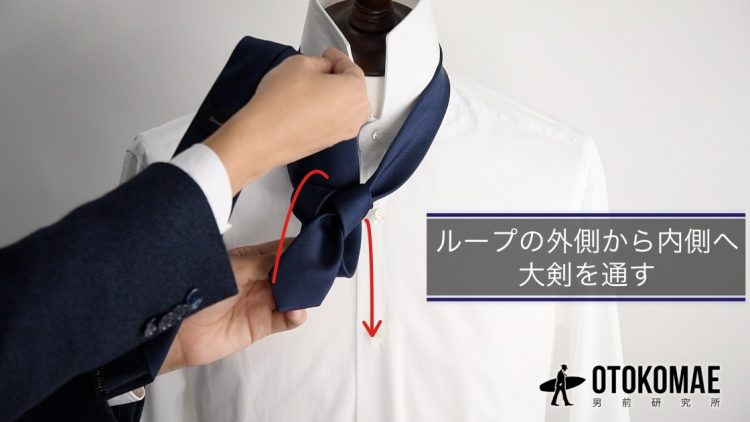
Windsor Knot – “Bring the large sword from the outside of the loop to the inside of the loop
The large sword is brought through from the outside of the loop to the inside, the opposite of the three previous steps.
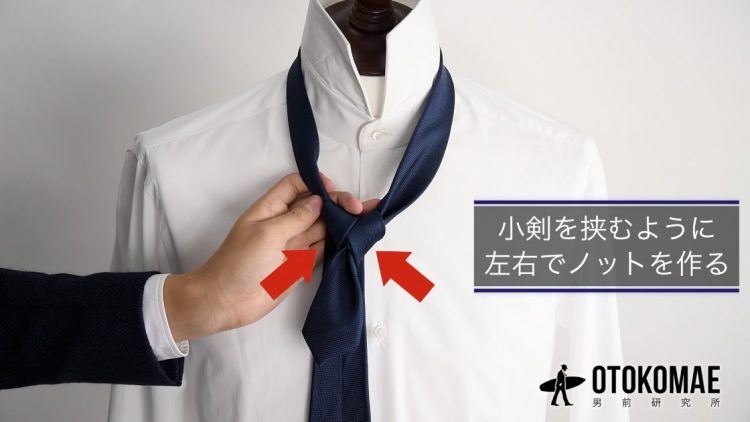
Windsor Knot – “Make a knot across the small sword
By making knots on both sides with the small sword in between, a plump triangular Windsor knot will be created when finished.
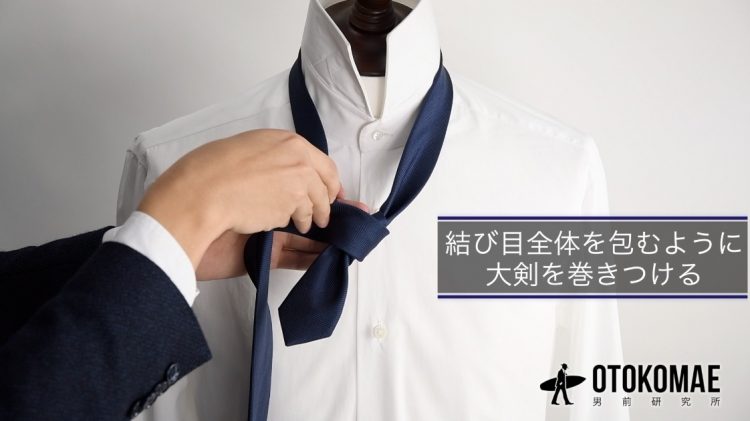
How to tie the Windsor Knot “Wrap around the entire knot
Wrap the large sword around the large sword in a large circle, wrapping it around all the multiple knots made so far, and pass it through the loop from the inside.
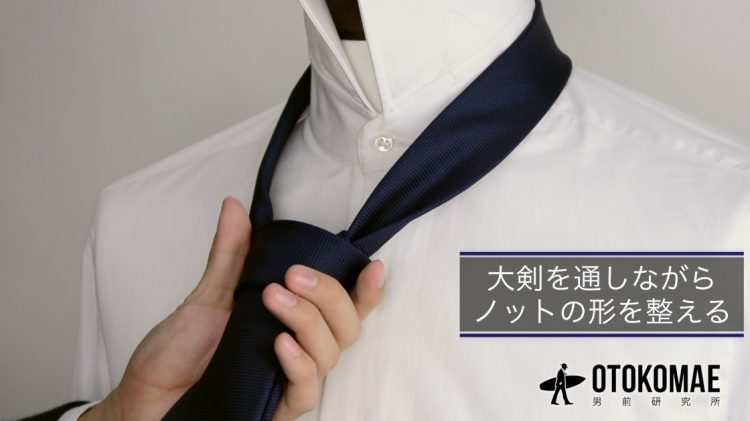
How to tie the Windsor Knot “Shape the knot while passing the large sword through
By threading the large sword through the knot while shaping the knot, the triangular shape of the knot can be kept neatly in place.
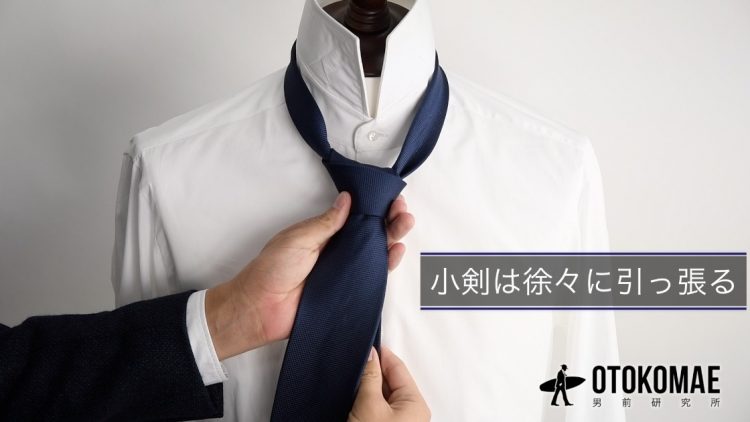
How to tie the Windsor knot: “Pull the small sword gradually “
When raising the knot by pulling the small sword, do not pull all at once, but raise it gradually to avoid unnecessary wrinkles and to reduce damage to the tie’s fabric.
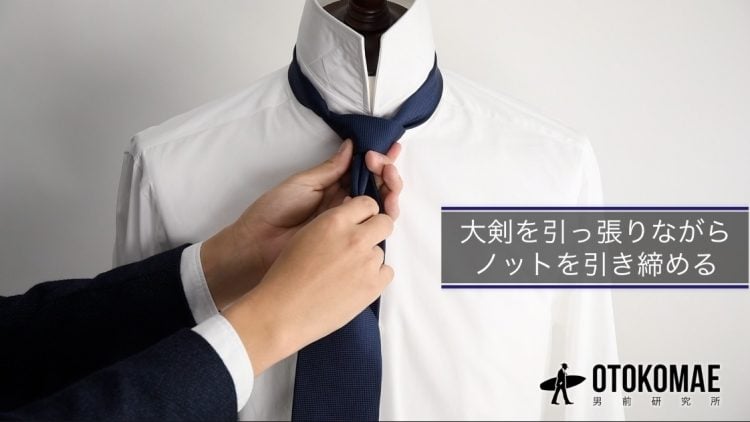
Windsor Knot – “Tighten the knot by pulling the large sword “
Once the knot has been raised to the neck, pull the large sword to tighten it. Be careful not to hold the knot firmly at this point, or it will lose its shape.
How to tie the Windsor knot “Shape the knot and you’re done!
Once the collar is down, balance the shape and position of the knot and you are done.






![How to Choose a Necktie [ 5 Perspectives on Choosing the Best Necktie ].](https://otokomaeken.com/wp-content/uploads/2017/12/c7c97bb73b0eb6488874d99641a5f9cd-630x331.jpg)
