Dimples on a necktie add a subtle, sophisticated look to a suit. There are advanced techniques for shifting the position of the dimples to the left or right, or for having two dimples, but no matter what you do, ” keeping the dimples intact ” is an important factor. In this issue, we will introduce some useful tips on how to make dimples!
Sponsored by
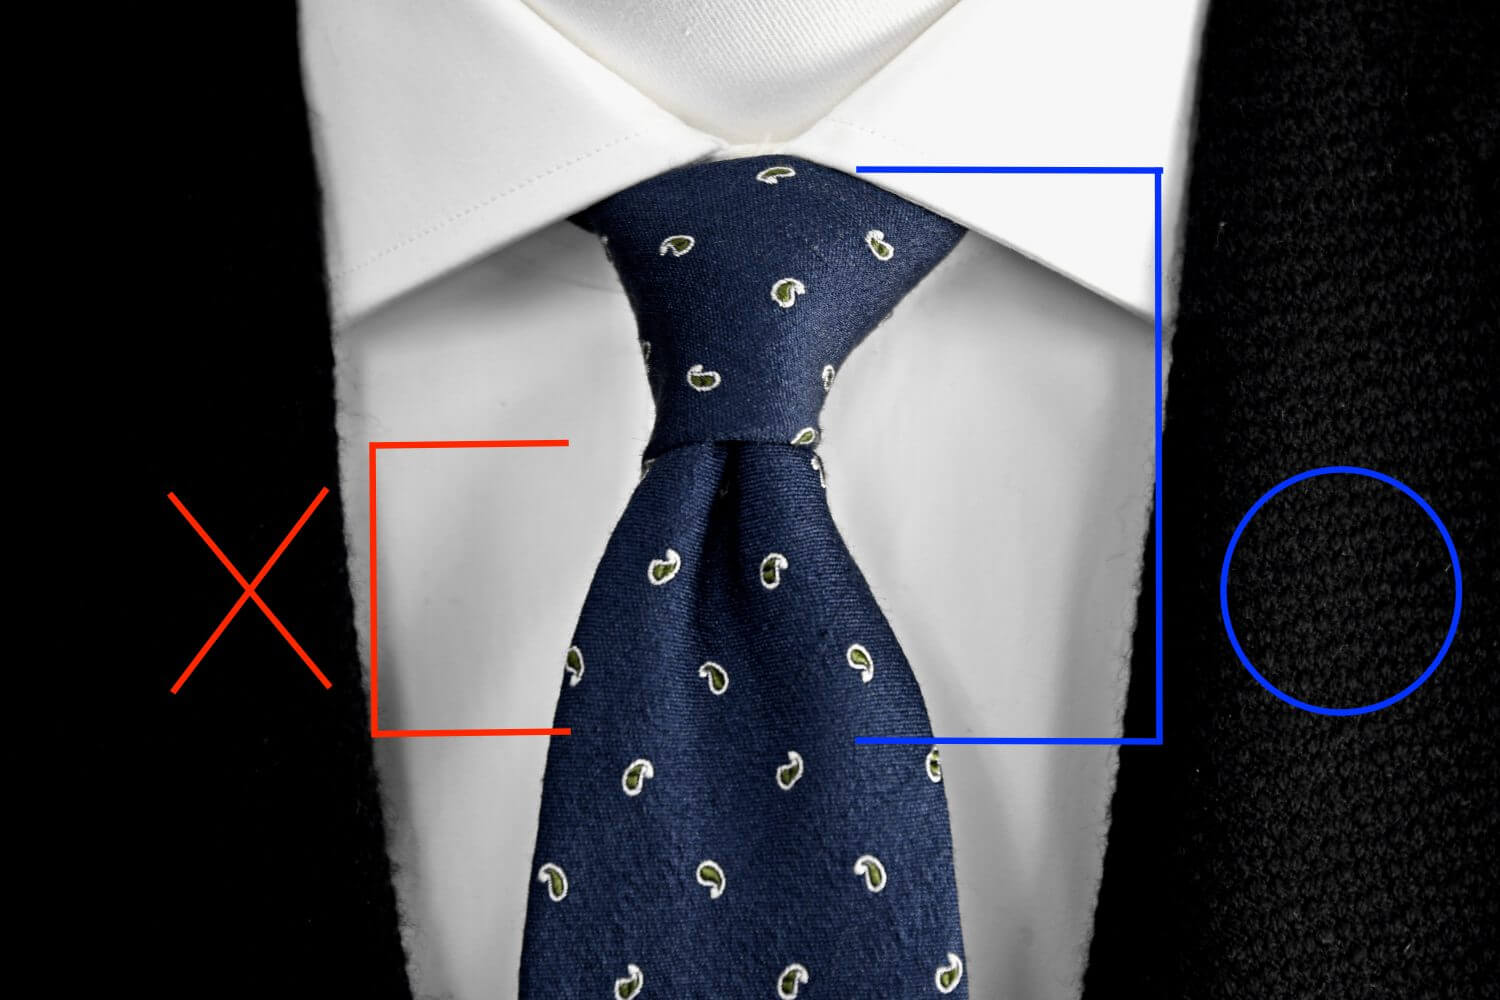
Tips for making dimples in a necktie = “Put the dimples from a higher position.
There are probably many people who have a dimple under the knot of their neckties. However, this is actually the main cause of dimples that are not well formed or fall apart. The trick is to start the dimples at the high point of the tie knot. It is easy to understand if you imagine that you are creating a firm foundation for the dimples.
How to tie a necktie ” how to make a dimple that stays in place all day
In this video, we will show you how to tie a tie with dimples!
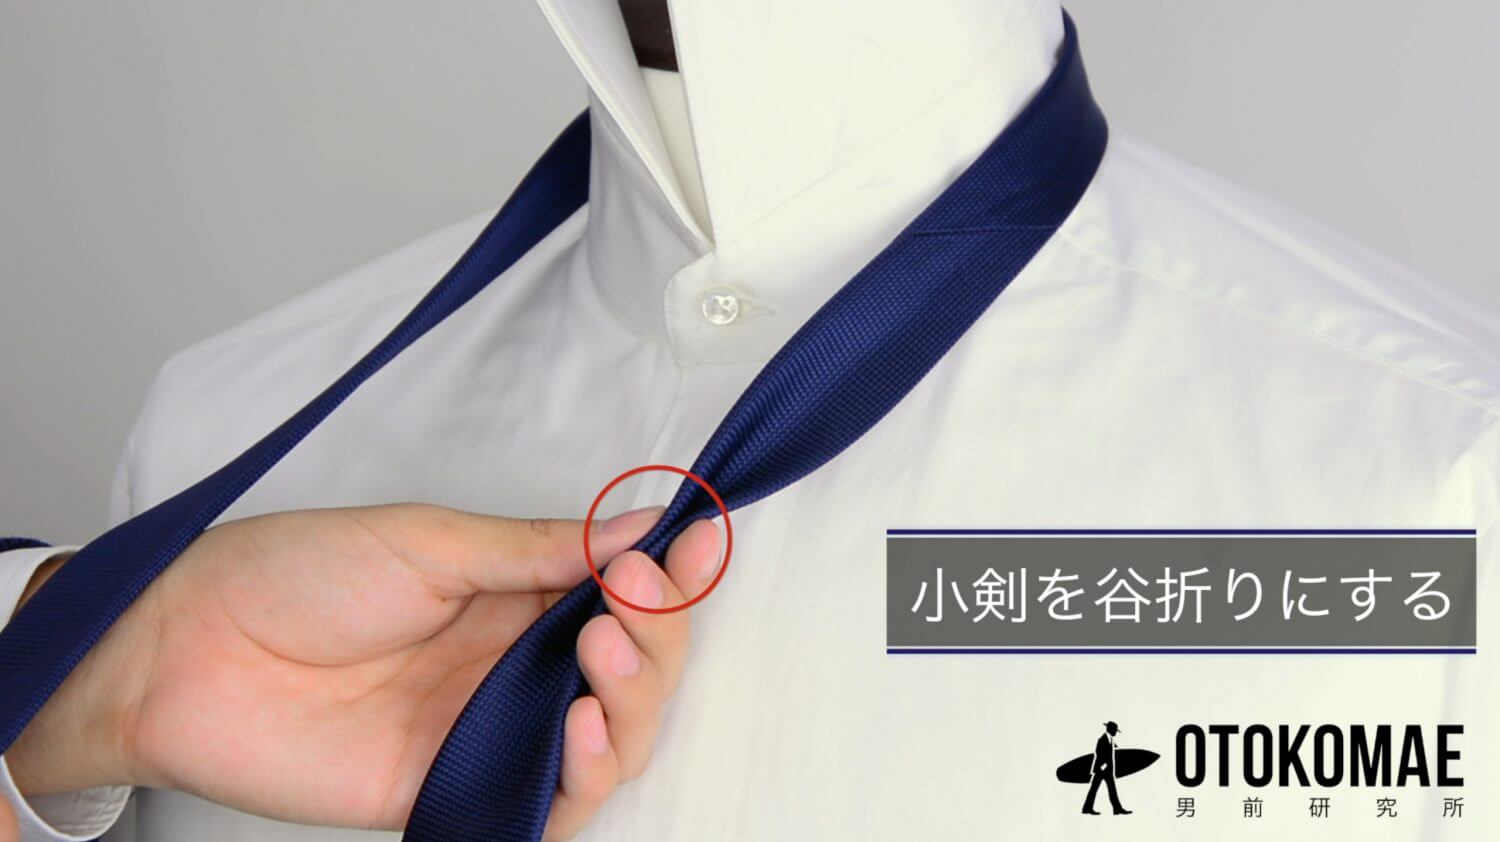
How to tie a necktie ” First fold the small sword into a valley fold
By first folding the small sword into a valley fold, it is easier to create a beautiful knot with no extra wrinkles.
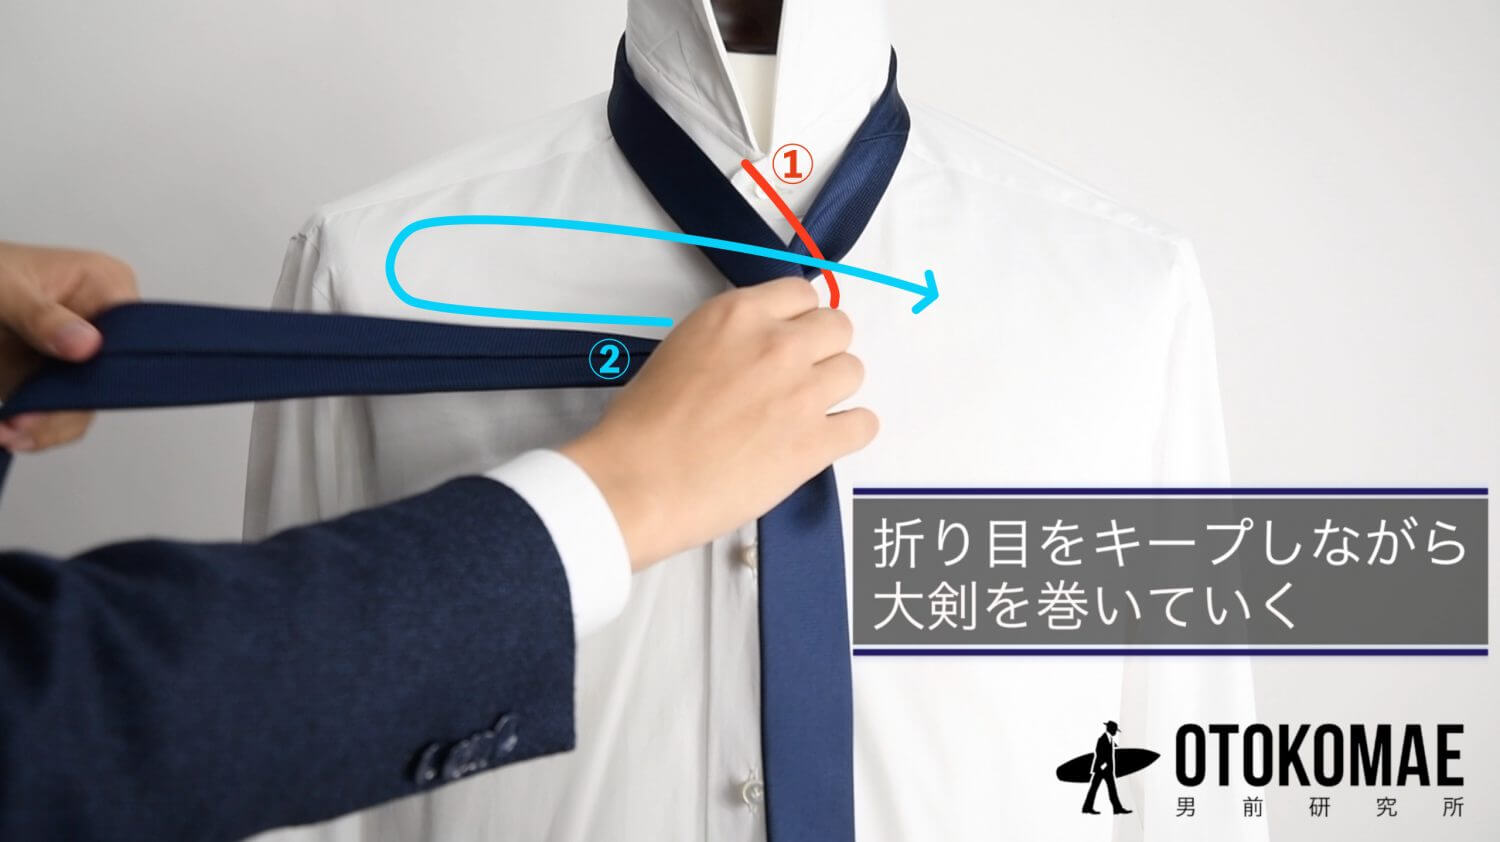
Tie knot: “Roll the large sword up while keeping the crease ” Tie knot
Wrap the large sword around the small sword so as not to break the small sword fold. Keep in mind that the small sword indentation should face the outside front.
Tie – “reverse the initial fold at the neck from left to right” Tie knot
The other side of the neck, which is created after wrapping the large sword, should be creased in the opposite direction of the initial valley fold.

Tie – “Threading the large sword through the knot
By passing the large sword through without breaking the initial fold, excess wrinkles will be prevented in the areas other than the dimples.

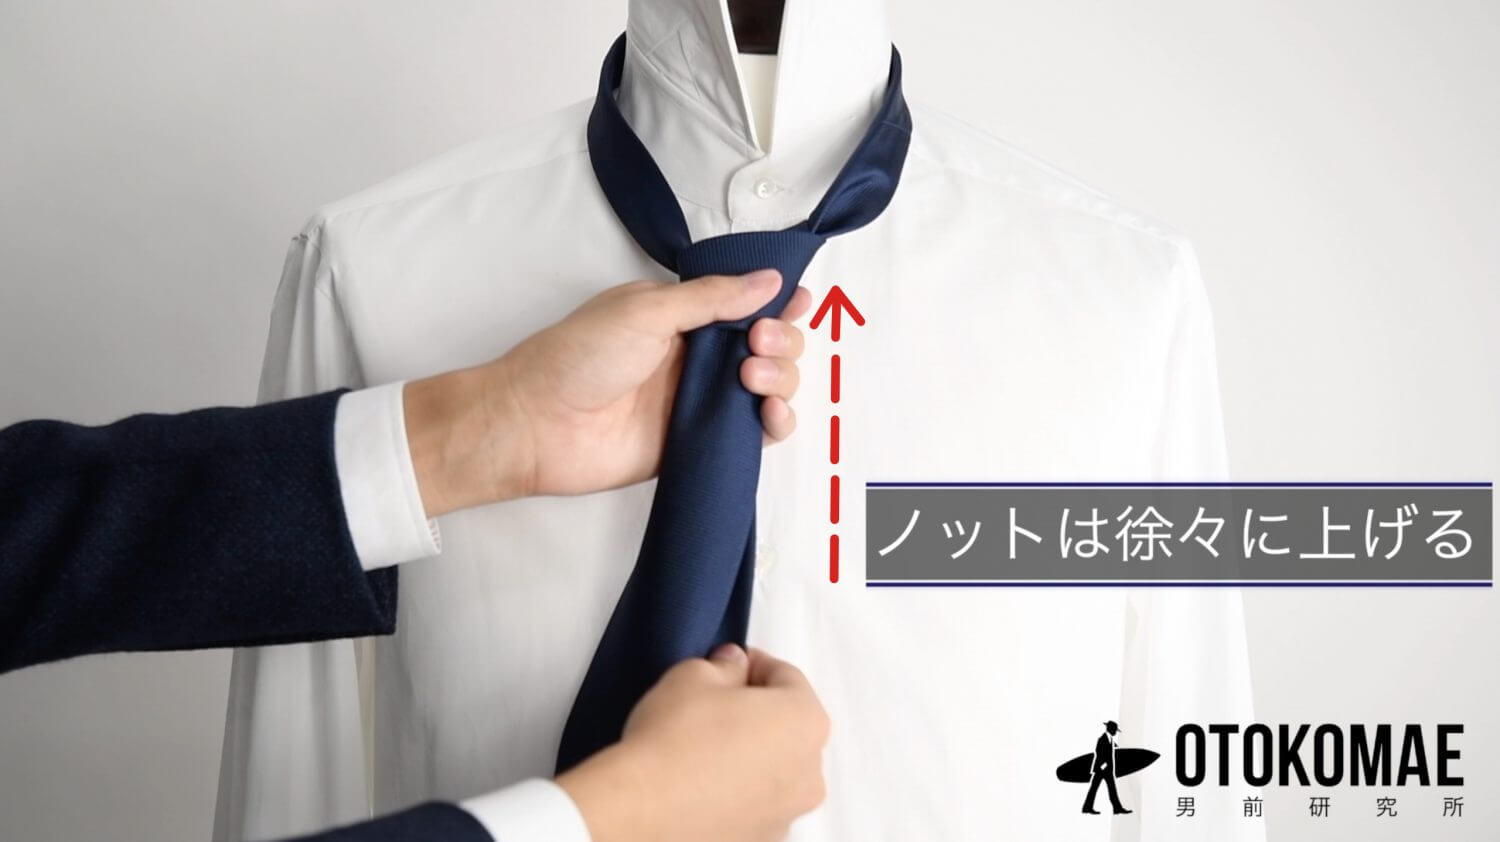
Tie – “Raise the knot gradually” Tie knot
Pull the small sword and raise the knot. By raising the knot gradually, wrinkles and damage to the fabric can be avoided.
Tie – “Insert fingers above and below the knot to create a dimple at the base” Tie – “Dimple the knot” Tie – “Pull the knot up gradually” Tie – “Pull the knot up gradually” Tie – “Dimple the knot” Tie – “Pull the knot up gradually”
Insert fingers from the top and bottom to create dimples from the base to create a dimple that will not collapse for a day.

Tie – “pull the large and small swords alternately while holding the dimples”
The knot will be tightened when the large sword is pulled, and the knot will be raised when the small sword is pulled, which will increase the degree of perfection.

Tie – “Shape the knot and you’re done!
A final check of the position and size of the knots and the balance of the dimples is all that is needed to complete the process.


![How to Wear a Gray Suit in Style [ 2025 Latest ].](https://otokomaeken.com/wp-content/uploads/2025/05/900c8292b914d56ce29033479c256d2c1928b24b82f84b40e72a3ce9a2d08a30-630x331.jpg)

![Suit & Sneaker Wear Guide. 3 principles and examples of men’s coordination without fail [ 2025 latest ].](https://otokomaeken.com/wp-content/uploads/2020/07/03b4c9f3f4bc613d0b1147ccd6821424f8add866ea336f963f056cbfb2d2fb87-630x331.jpg)
![Dissecting the appeal of Daniel Craig’s suit style! [ 007 James Bond ]](https://otokomaeken.com/wp-content/uploads/2017/09/1-630x331.jpg)


![The Complete Guide to Jackets [ Royal Combinations, Basic Rules for Never Making a Mistake, Examples of Codes, and Recommended Items ].](https://otokomaeken.com/wp-content/uploads/2026/03/c9e62da8005f3f4de1ab842ea4e26dce313aa618a1f18a8f1657a283c4a08dcb-630x331.jpg)


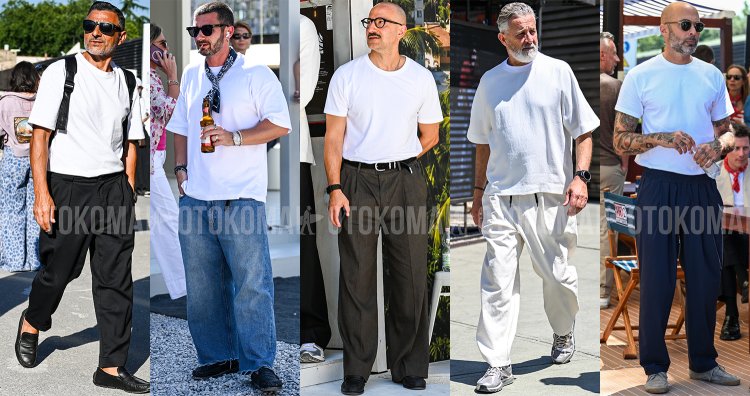
![Black T-Shirt Outfit Ideas: [Styling Tips from Fashionistas & 5 Must-Have Pieces]](https://otokomaeken.com/wp-content/uploads/2026/07/eb8758702e2ecf73686cad623d2e1aad-750x396.jpg)


![A reference book on how to coordinate shorts for adults [ from practical advice to pointers you'll want to talk about ].](https://otokomaeken.com/wp-content/uploads/2025/07/722fc9eed6eea53457781f45fdb71a972e3000922bbad94b4a83a7f077160fd6-750x396.jpg)